Install and set up the MonoCloud Next.js SDK
This guide shows how to install the MonoCloud Next.js SDK and connect your Next.js application with MonoCloud authentication.
By the end of this guide, you will have:
- A MonoCloud application configured in the Dashboard
- The SDK installed in your Next.js project
- Authentication enabled across your application
Sign up and configure MonoCloud
If you already have a MonoCloud account and Web App, skip ahead to Install the MonoCloud Next.js SDK.
Create a MonoCloud account
If you don’t have an account yet, sign up at: https://www.monocloud.com
Create a Web App
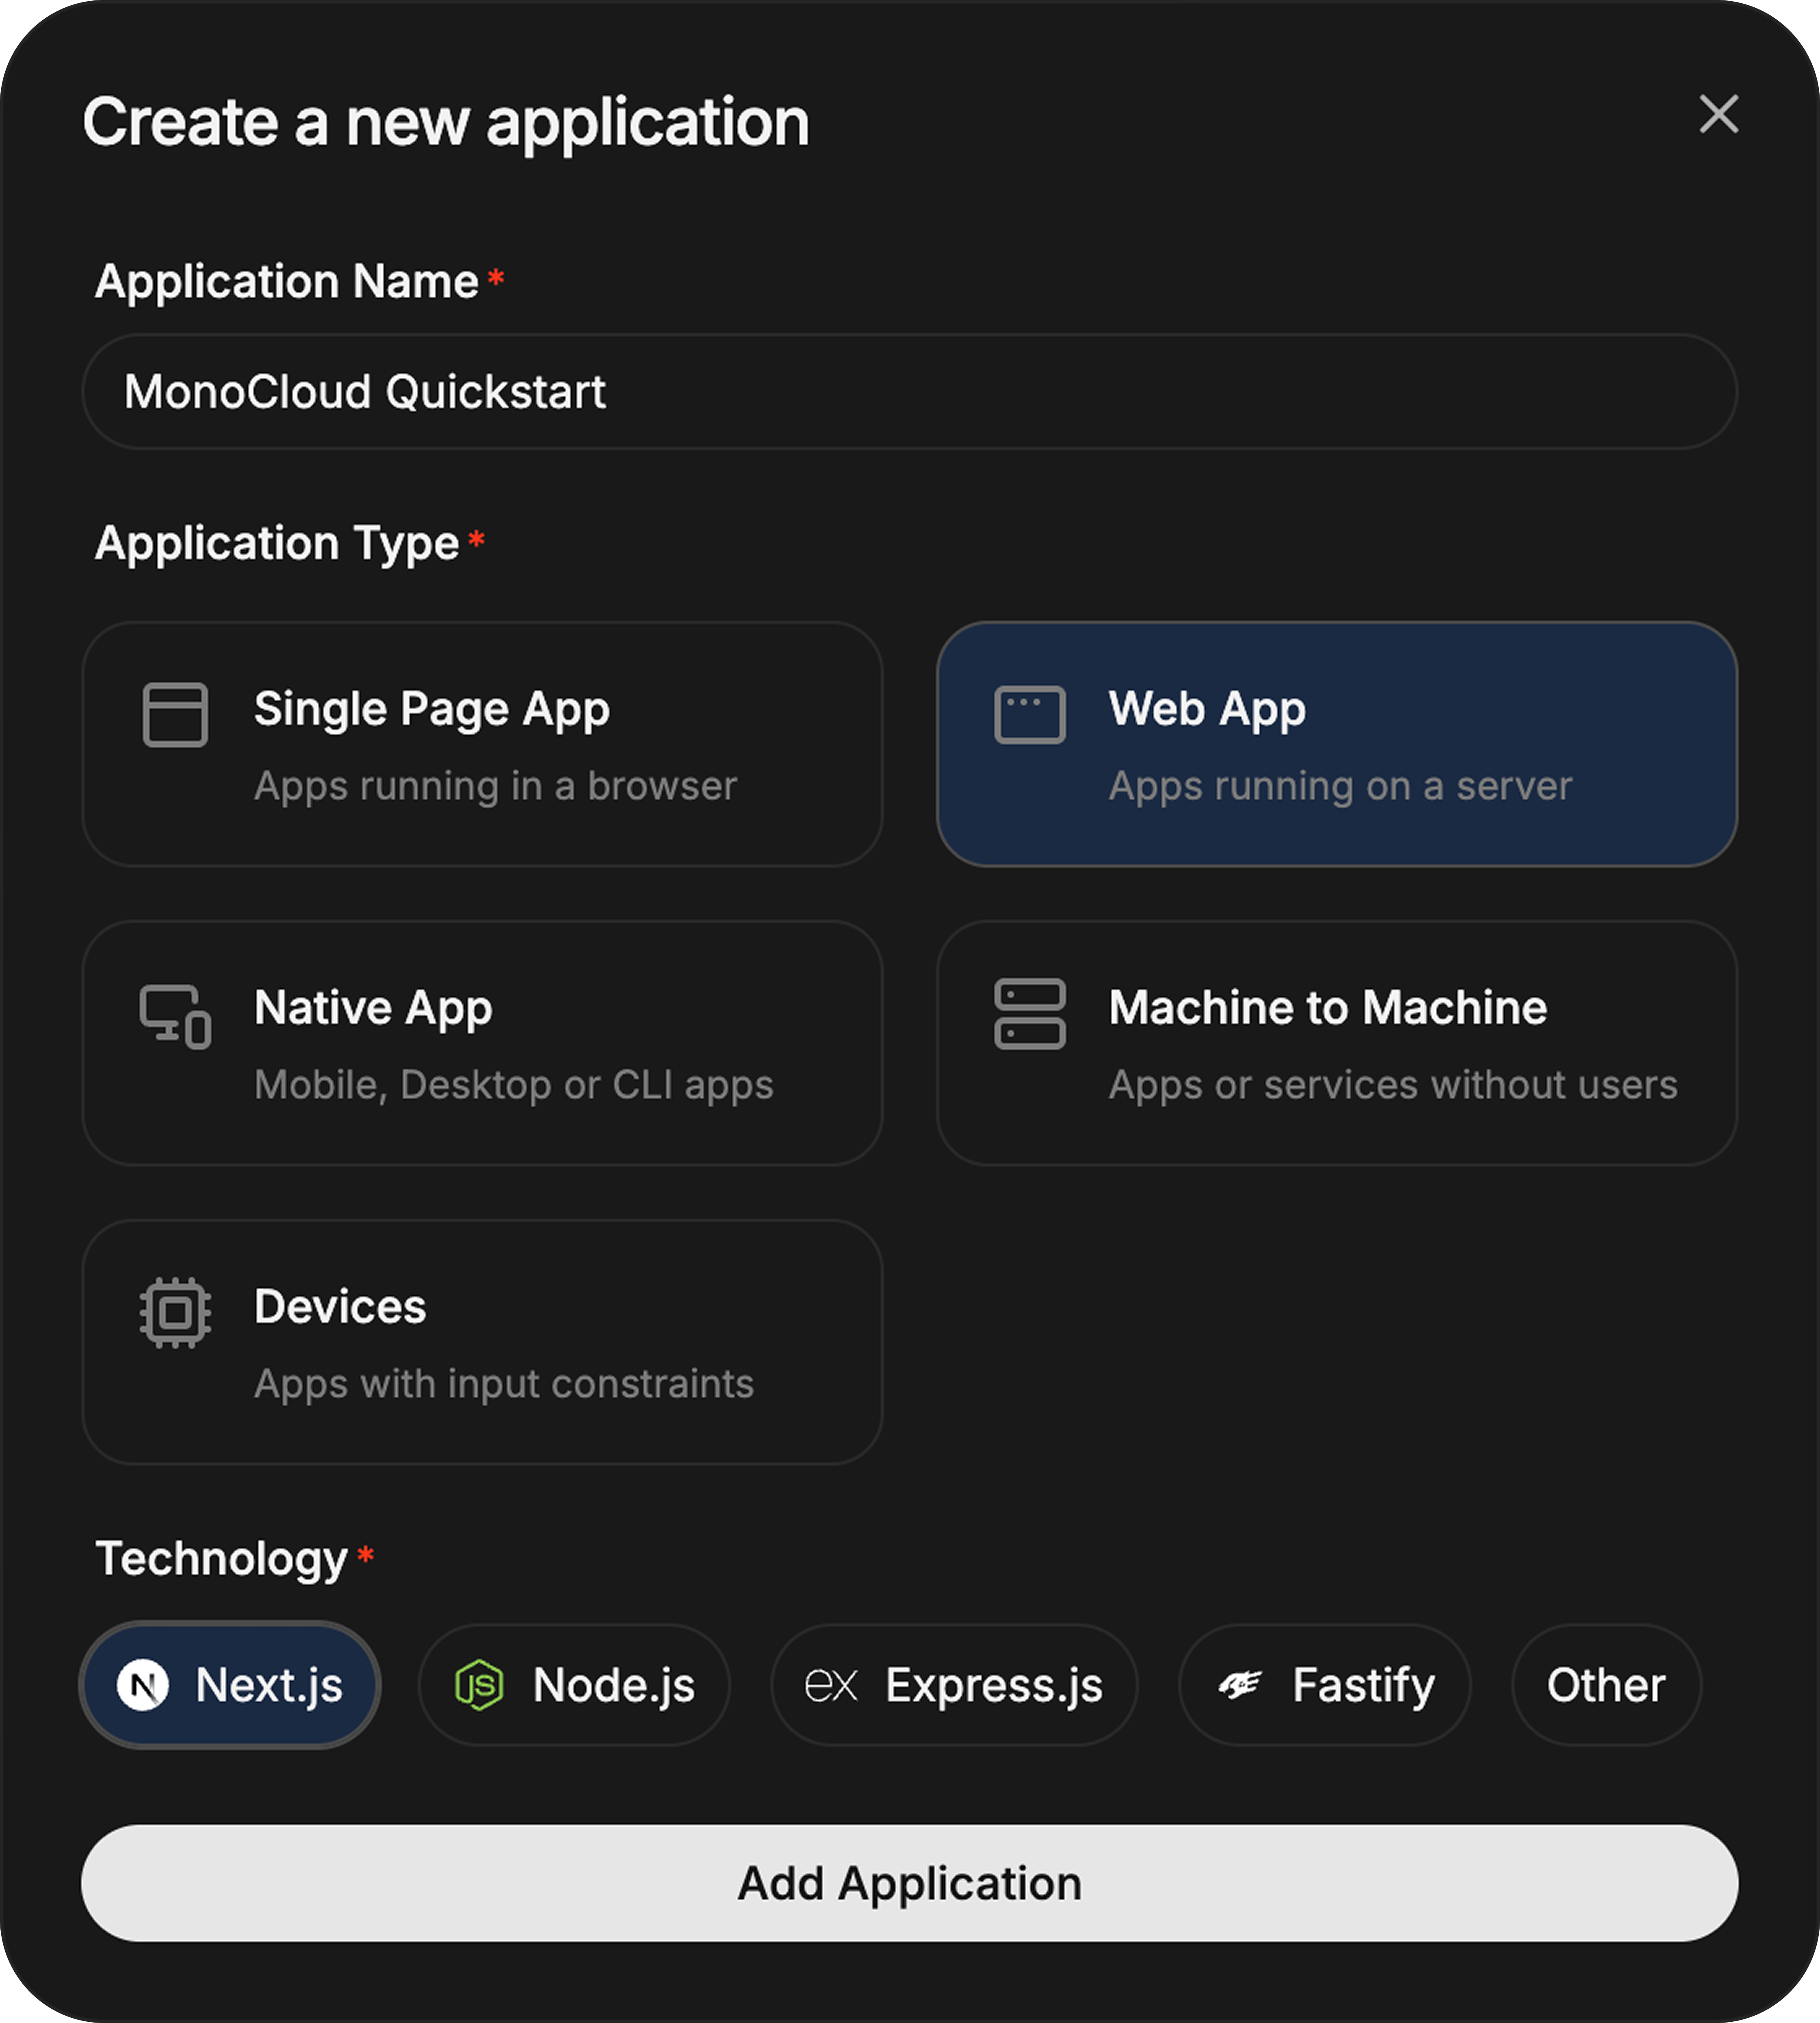
In the MonoCloud Dashboard:
- Click Add Application
- Select Web App
- Choose Next.js
- Create the application
Each Web App represents a single application secured by MonoCloud.
Configuring your Web App
Open your Web App and configure the following URLs.
Redirect URLs
These URLs tell MonoCloud where to redirect users after authentication events.
For local development, configure:
- Callback URLs:
http://localhost:3000/api/auth/callback - Sign-out URLs:
http://localhost:3000
Replace these with your production URLs before deployment.
Create your Next.js project
If you already have a Next.js project, skip this step.
npx create-next-app@latest <your-app-name>
cd <your-app-name>
Node.js 18 or later is recommended.
Install the MonoCloud Next.js SDK
Install the SDK using your package manager:
npm install @monocloud/auth-nextjs
Configure environment variables
See the Environment Variables reference for the full configuration list.
By default, the SDK is configured using environment variables (recommended). To configure the client programmatically, see Advanced: Custom Client Configuration.
Create a .env.local file in your project root:
MONOCLOUD_AUTH_TENANT_DOMAIN=https://<your-domain>
MONOCLOUD_AUTH_CLIENT_ID=<your-client-id>
MONOCLOUD_AUTH_CLIENT_SECRET=<your-client-secret>
MONOCLOUD_AUTH_SCOPES=openid profile email
MONOCLOUD_AUTH_APP_URL=http://localhost:3000
MONOCLOUD_AUTH_COOKIE_SECRET=<random-secret>
Where to find these values
| Environment variable | Where to find the value in MonoCloud |
|---|---|
MONOCLOUD_AUTH_TENANT_DOMAIN | Domain from Application Information |
MONOCLOUD_AUTH_CLIENT_ID | Client ID from Application Information |
MONOCLOUD_AUTH_CLIENT_SECRET | The secret from the Application Information |
MONOCLOUD_AUTH_SCOPES | Set to openid profile email |
MONOCLOUD_AUTH_APP_URL | Base URL of your app (use http://localhost:3000 in development) |
MONOCLOUD_AUTH_COOKIE_SECRET | A random secret used to sign session cookies |
Generate a cookie secret using:openssl rand -hex 32
Once these variables are set, authentication is automatically initialized — no additional configuration is required.
Register the authentication middleware
The MonoCloud SDK exposes an authMiddleware() function that enables authentication and protects all routes matched by the middleware matcher configuration.
Create a proxy.ts file in the project root:
If you are using Next.js 15 or earlier, name this filemiddleware.tsinstead.
import { authMiddleware } from "@monocloud/auth-nextjs";

export default authMiddleware();

export const config = {
  matcher: ["/((?!_next/static|_next/image|favicon.ico|sitemap.xml|robots.txt).*)"],
};
By default, every route matched by the middleware is protected. Use the protectedRoutes option to control which routes require authentication.
No additional setup is required — authentication works automatically once middleware is registered.
All SDK helpers (for example getSession(), protectPage(), and protectApi()) can now be imported directly from the package and work automatically.
Advanced: Custom Client Configuration
By default, the SDK exposes function exports (for example, authMiddleware(), getSession(), getTokens()) that work automatically using the default MonoCloud client configured from environment variables.
Create your own MonoCloudNextClient instance only when you need multiple configurations, dependency injection, or explicit control over initialization.
import { MonoCloudNextClient } from "@monocloud/auth-nextjs";

export const monoCloud = new MonoCloudNextClient({
  routes: {
    signIn: '/custom-login',
  }
});
After creating a custom client, call methods on that instance instead of importing the default helpers.
import { monoCloud } from "@/monocloud";

export default async function Page() {
  const session = await monoCloud.getSession();

  if (!session) {
    return <>Not signed in</>;
  }

  return <>Hello {session.user.name}</>;
}
Next steps
Explore route protection and advanced patterns: